

How To Install Windows Server 2012 R2 Step By Step
In this web log, nosotros'll learn the skill to make a Microsoft Windows Failover Cluster with Windows Server 2022. The environs may be a ii-node cluster with one shared disk.
Environment details:
SRV2019-DC
x.0.0.xx
SRV2019-one
Principal – 10.0.0.xxx
Cluster – 192.168.0.ten
SRV2019-2
Primary : 10.0.0.40
Cluster: 192.168.0.20
iSCSI Storage : 10.0.0.100
Cluster Name – XTCLUSTER
Cluster IP Address – ten.0.0.110
i- Before nosotros commencement, make certain you meet the following prerequisites:
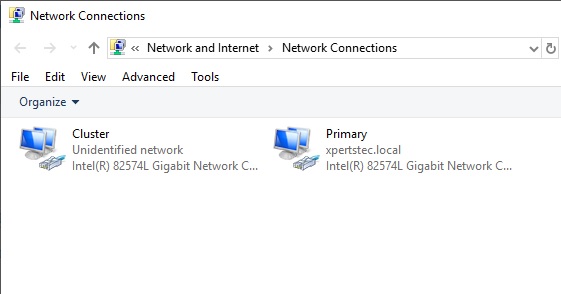
I have 2 Windows Server 2022 machines with the latest updates installed. The machines have at least 2 network interfaces, I rename them Primary and Cluster.
Bring together both servers to your Microsoft Active Directory domain and ostend that both servers see the shared memory device available in deejay management. So, don't bring the disk online nevertheless.
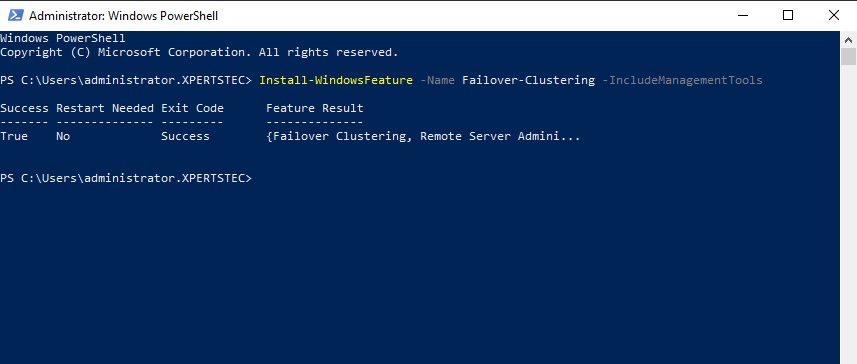
ii- User the Post-obit PowerShell control to enable failover clustering and direction Toole 1 Node (SRV2019-1)
Install-WindowsFeature -Name Failover-Clustering –IncludeManagementTools
Failover Cluster Server 2022
Enabling Failover Manager Feature in 2 Node (SRV2019-2).
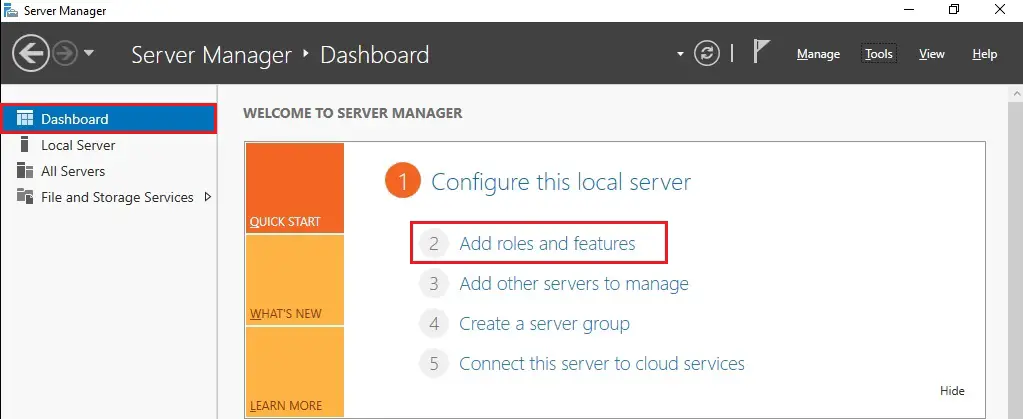
iii- Open up Server Manage select dashboard and then click on ADD Roles and Features.
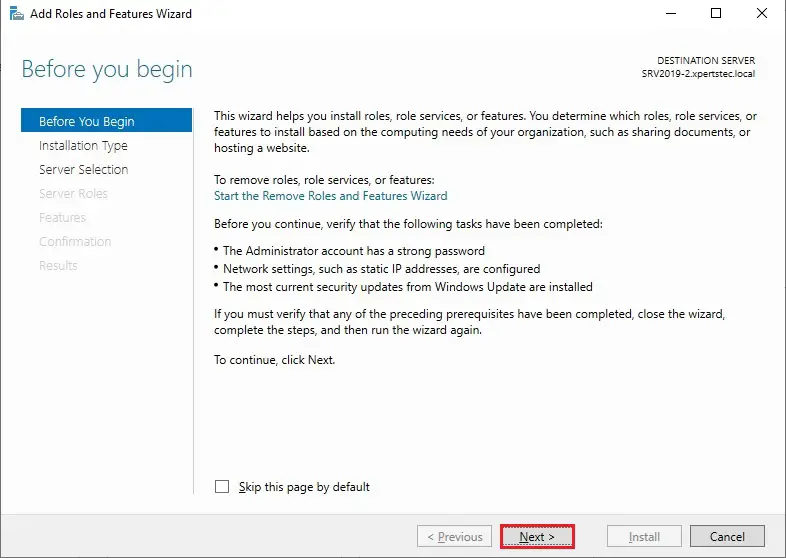
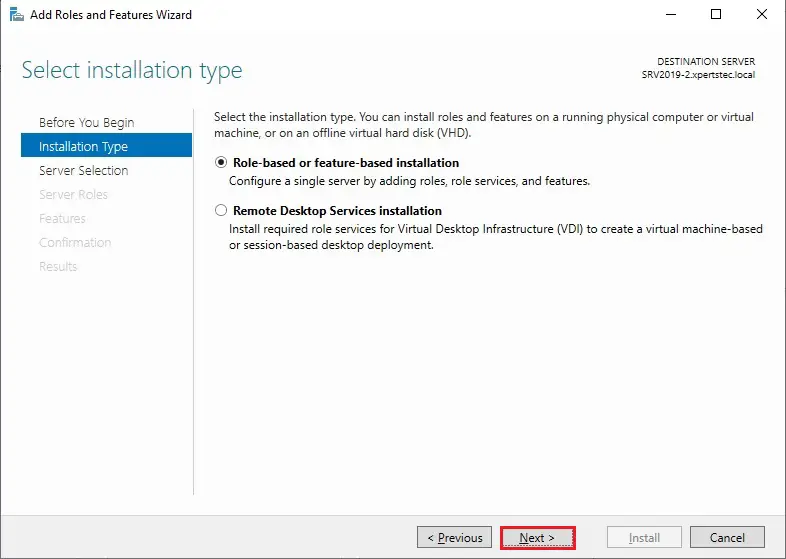
iv- So, click Next.
5- Click Part-based or feature-based installation and then click Next.
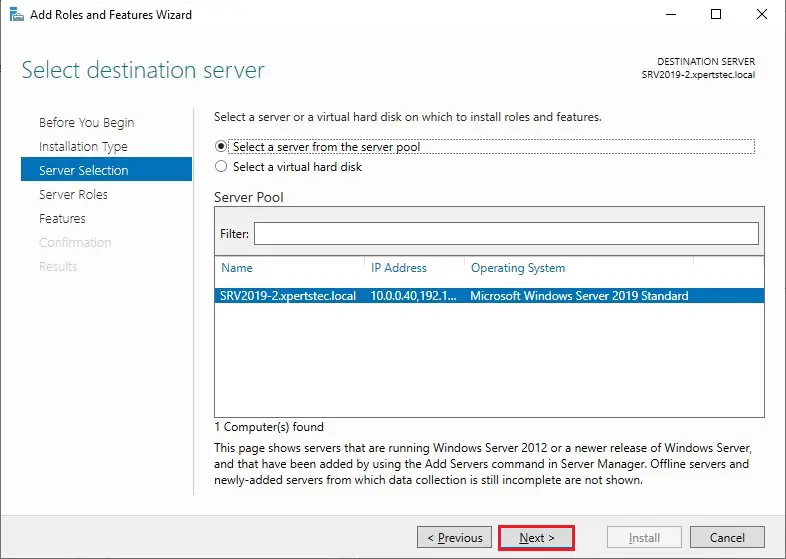
6- Select a server from the server pool and and so click next.
7- So, click Next.
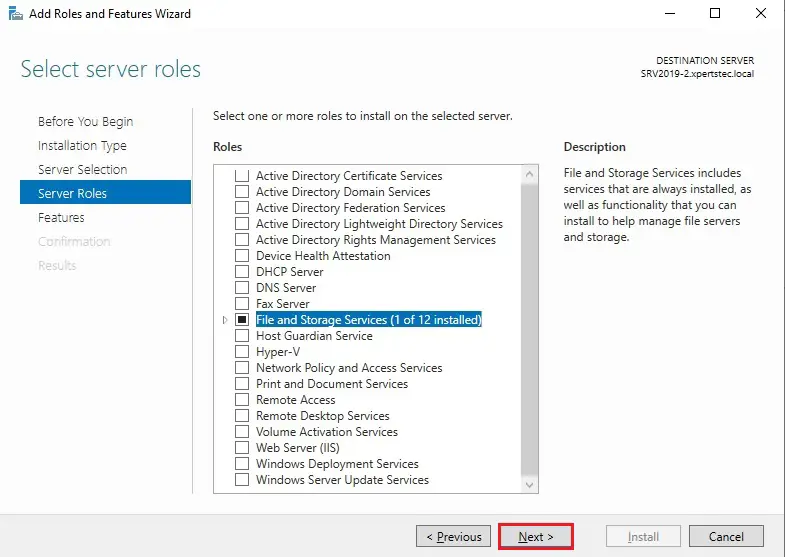
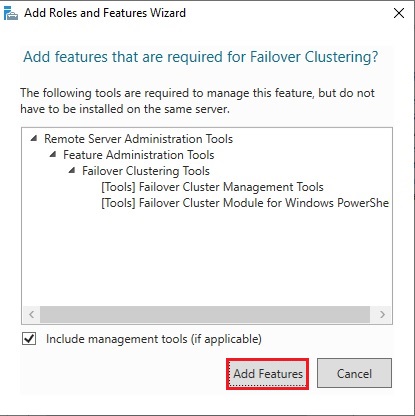
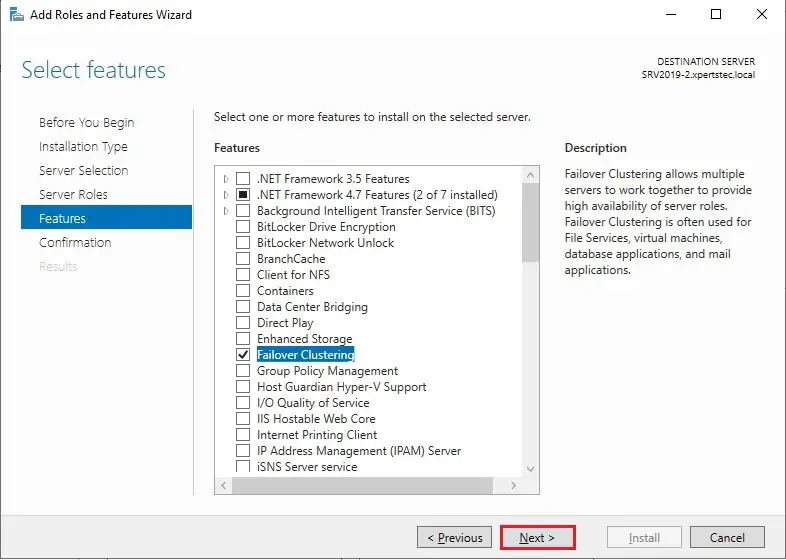
eight- Select Failover clustering.
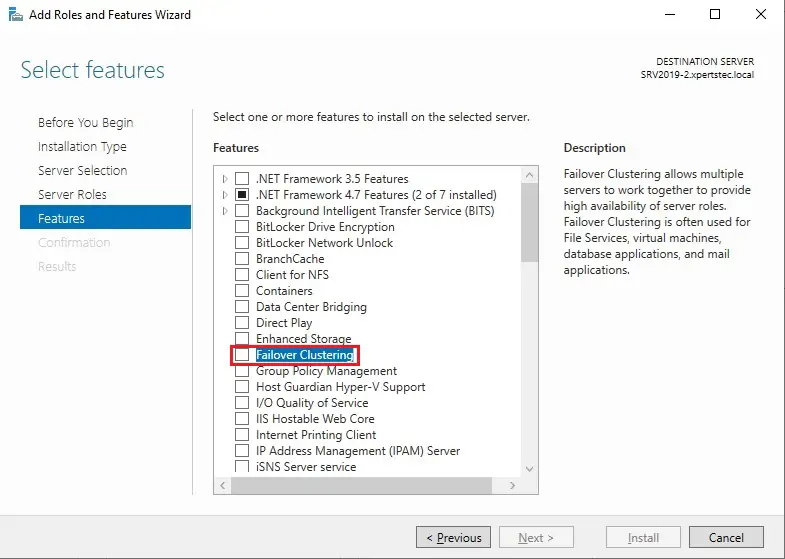
nine- Click Add together features.
10- After enabling the failover clustering characteristic so, click side by side.
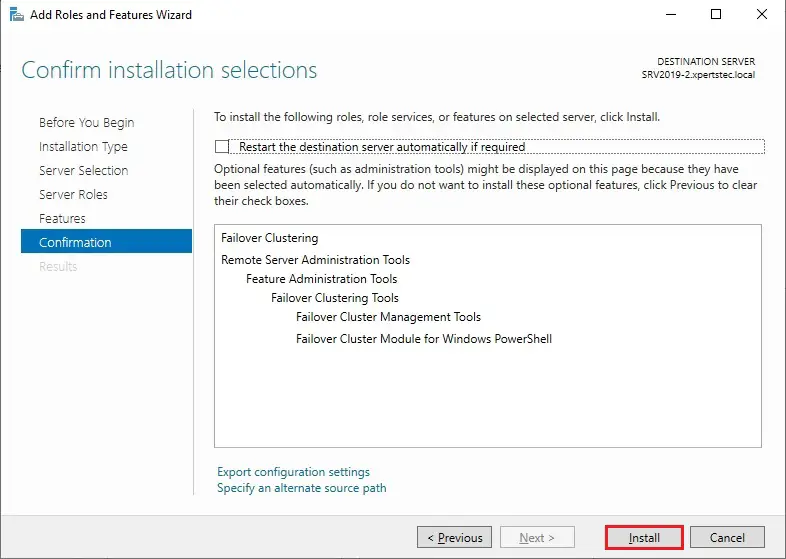
11- And so click Install.
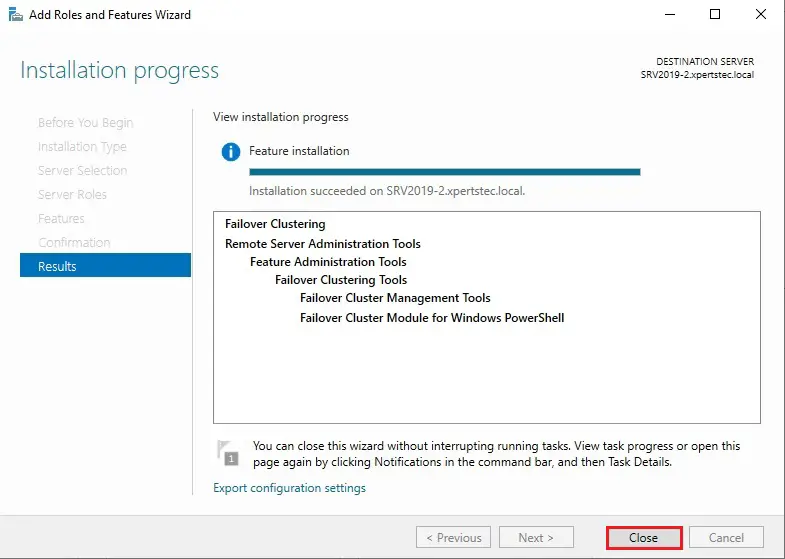
12- Successfully enable the Failover cluster feature and then, click Close.
thirteen- After a successful installation, it appears in the Server Manager, click Tools, and then Failover Cluster Manager.

Afterward y'all installed the Failover Clustering characteristic and so, y'all can bring the shared disk online and format it on 1 of the servers one Node (SRV2019-1).
The post-obit steps are performed on the 1 Node (SRV2019-1).
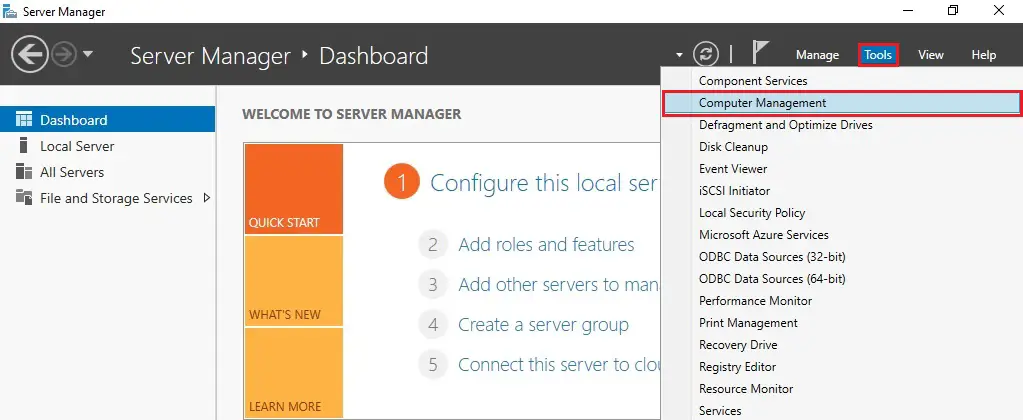
14- In Server Manager click Tools and and then click Computer Management.
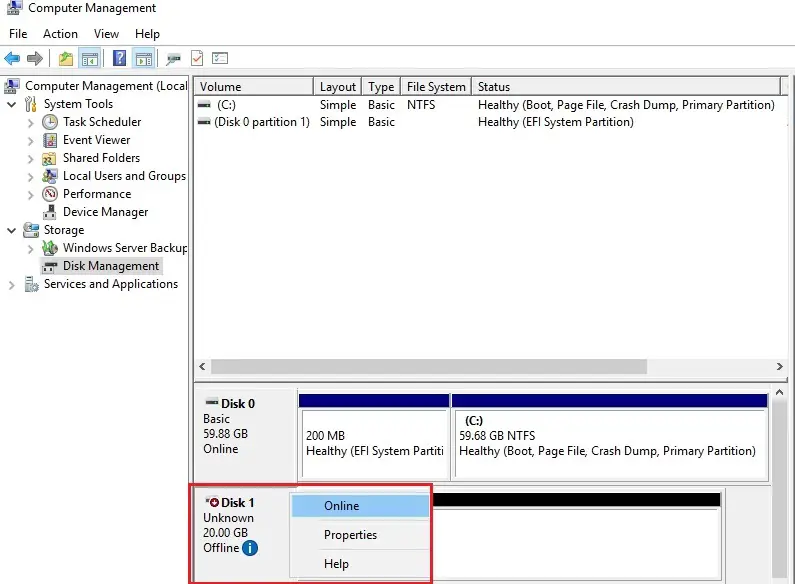
15- Click on Disk Management.
ou will see disk 1 which is in offline status correct click on disk 1 and then select Online.
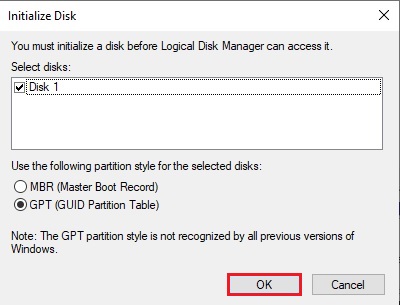
xvi- Right-click on disk one and click Initialize Deejay.

17- Click OK.
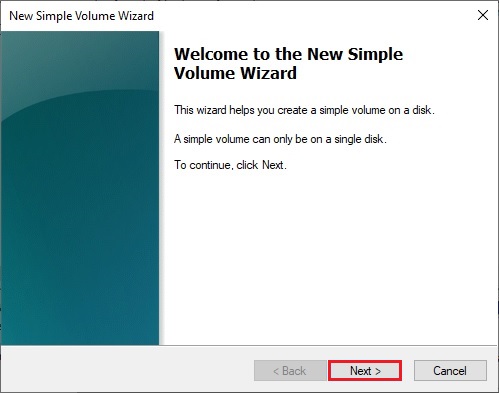
xviii- Right-click on unallocated disk 1 and select New Simple Volume.

nineteen- Click Next.
20- Click Side by side.
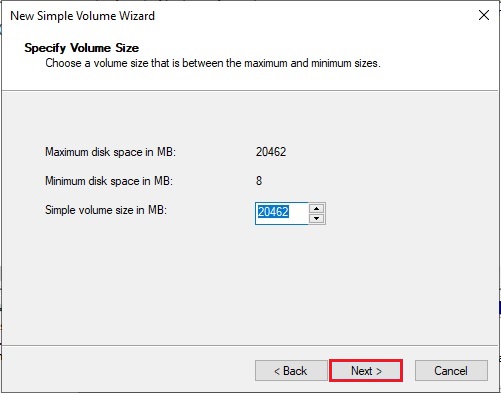
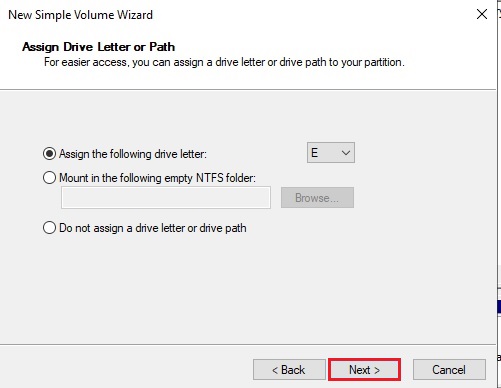
21- Assign a drive letter and click Adjacent.
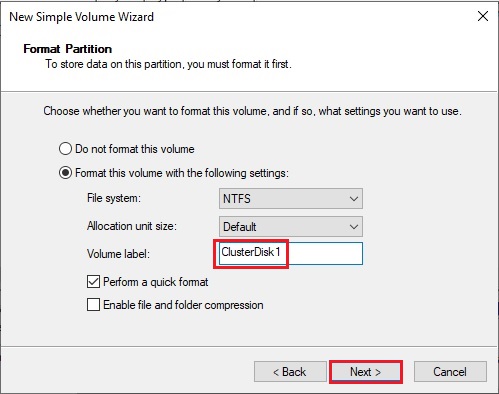
22- Blazon a volume label and click next.
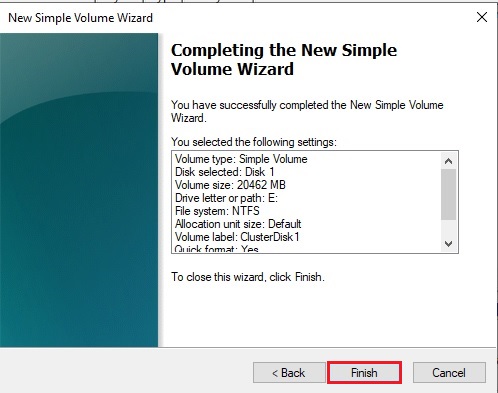
23- Click Finish.
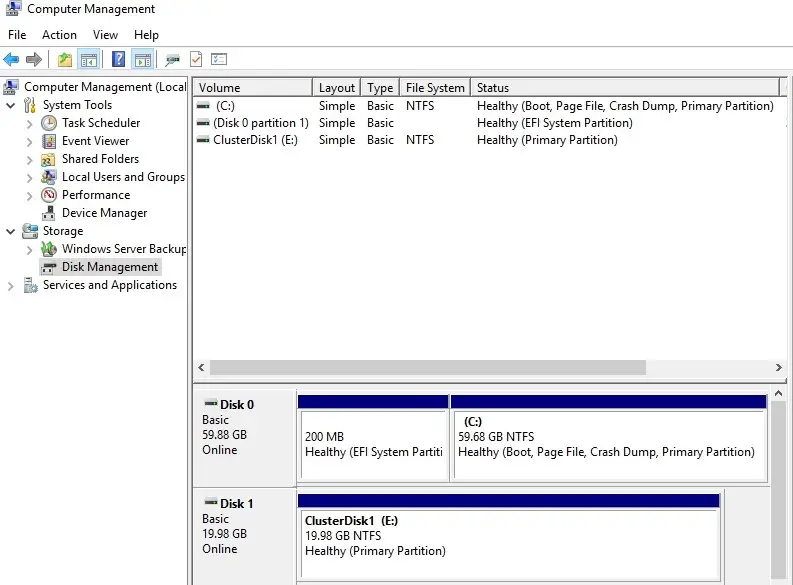
24- 1 Node (SRV2019-one) Disk Direction (disk status online)
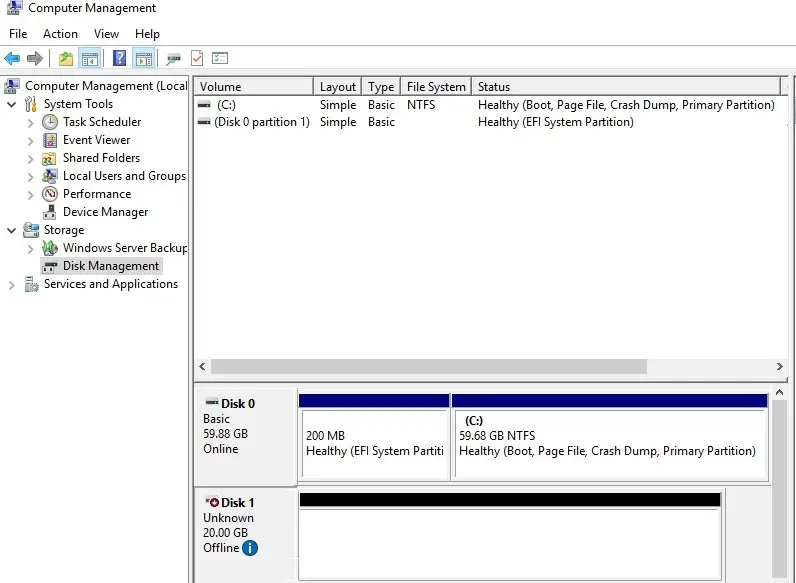
25- Delight Don't change anything on the twond Node (SRV2019-ii), the disk stays offline. 2ND Node (SRV2019-2) Deejay Direction (disk status offline).
Failover Cluster readiness check-in 1 Node (SRV2019-1).
Earlier we create the cluster, we'd like to form sure that everything is about up properly.
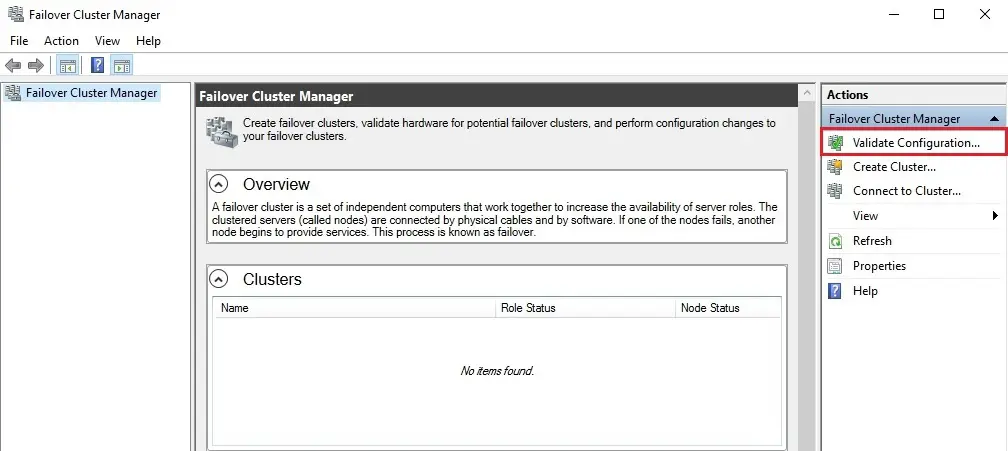
26- In Server Director click Tools and Click Failover Cluster Manager.

27- Under Action bill of fare click Validate Configuration.
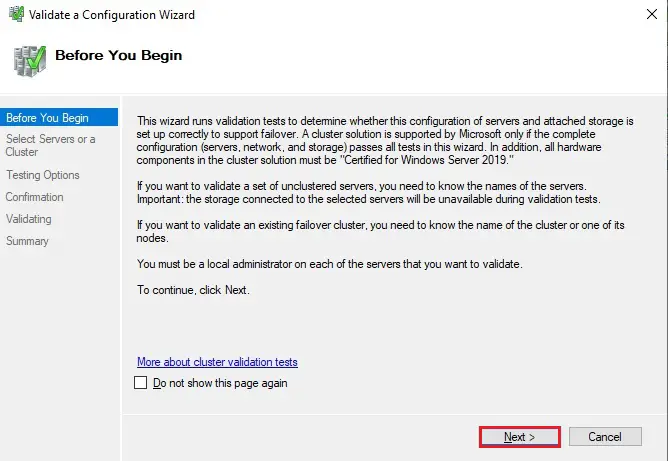
28- Click Next.
29- Select the browse button.
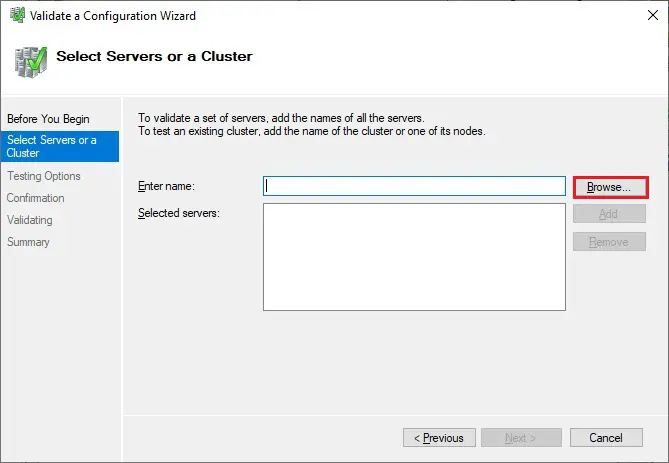
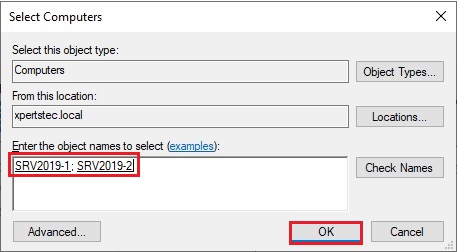
30- Blazon both the Nodes name, click bank check name and click ok.
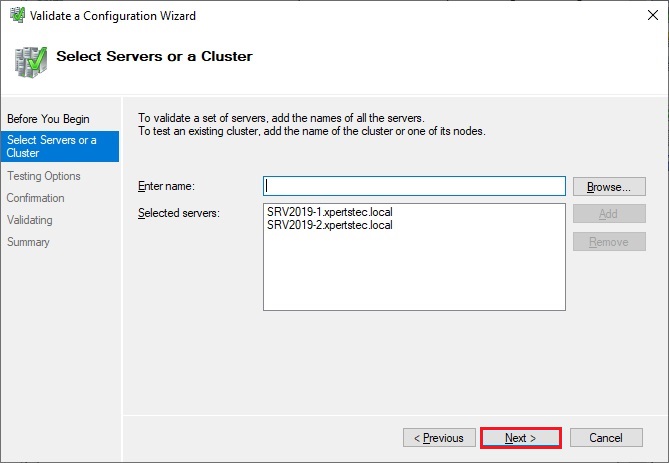
31- After Selecting the two-node servers for validation, click adjacent.
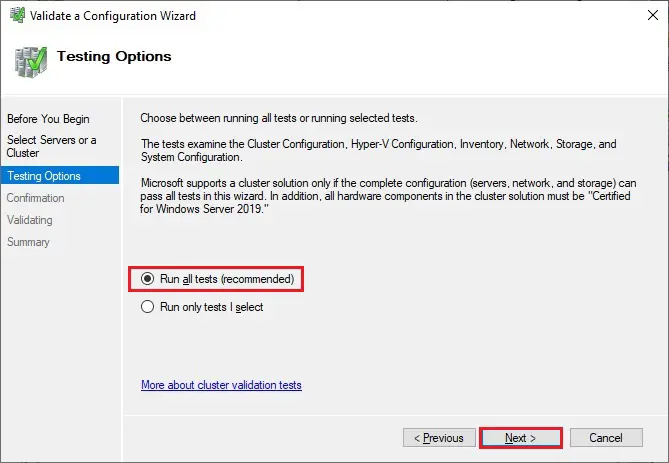
32- Select Run all tests (recommended) and click next.
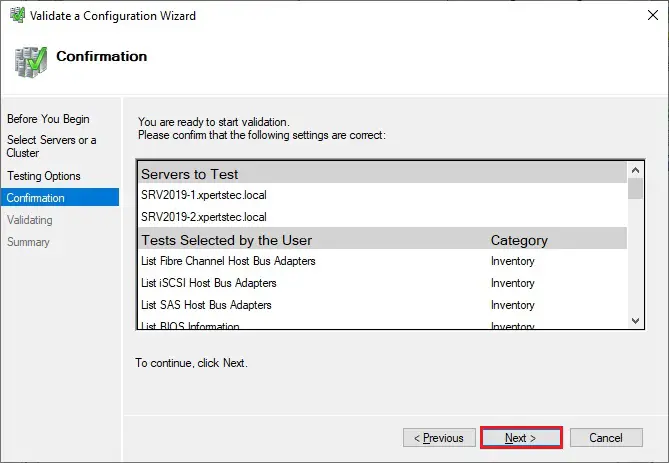
33- Review the validate configuration confirmation and click next.
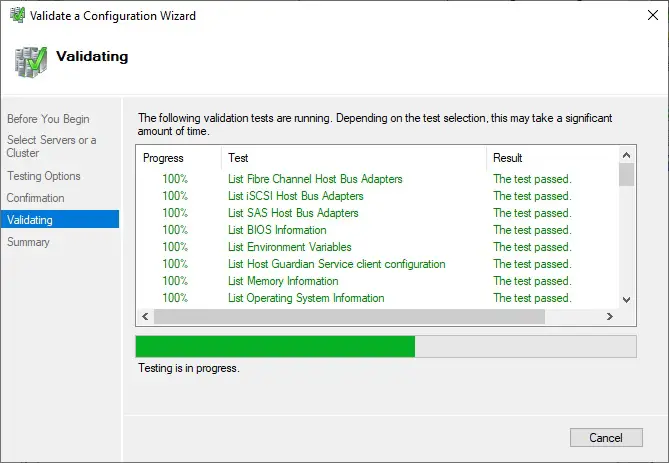
34- Cluster validation testing is in progress.
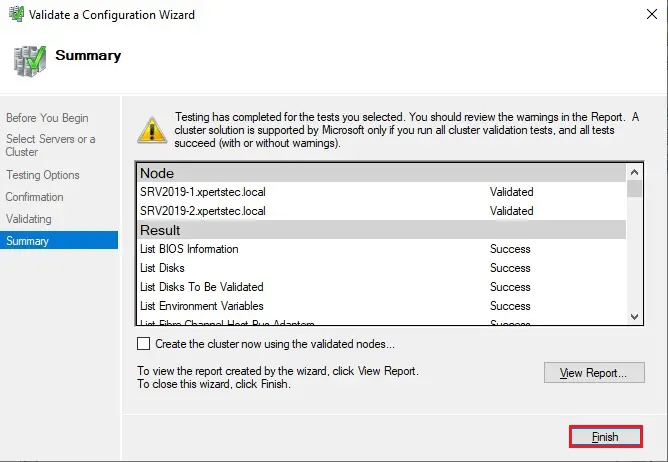
35- Subsequently yous make sure that every applicable test passed with the condition successful. If you take any errors or warnings, you can use the detailed report by clicking on View Report and click Terminate.
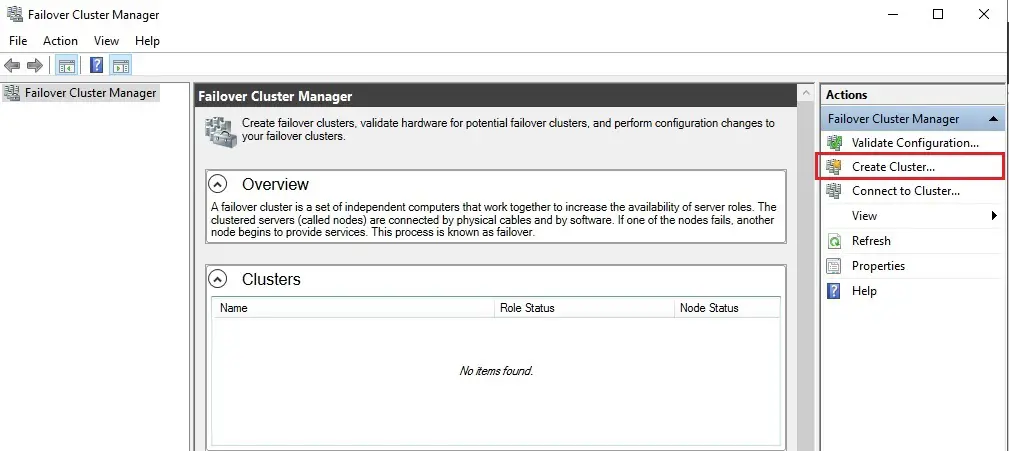
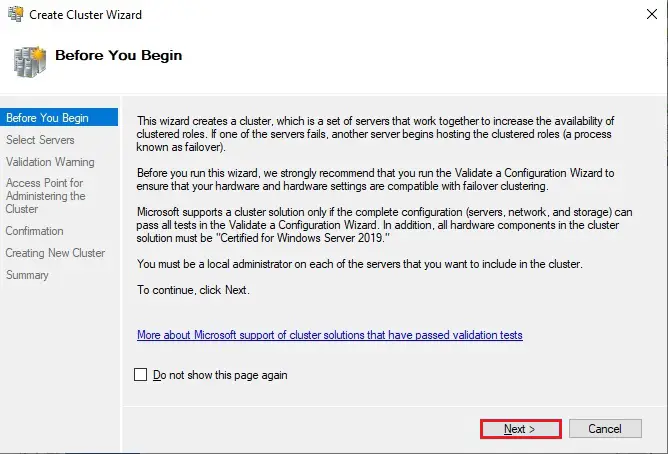
Create a Failover Cluster Server 2022
36- Nether Activity Menu so, select Create Cluster.
37- Click Side by side.
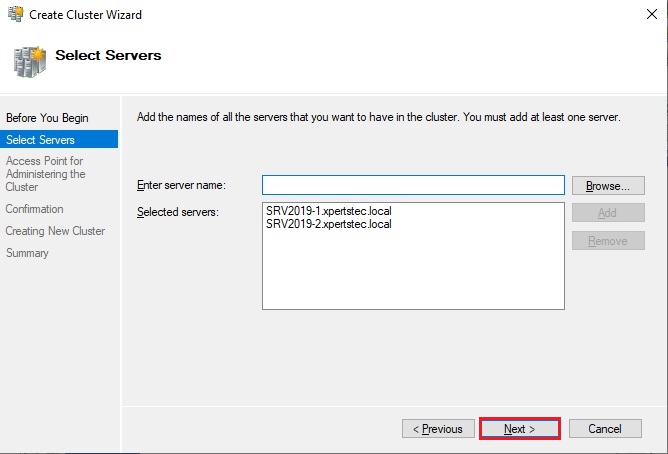
38- Click the browse button.

39- Type both the node names, click check names and click ok.

40- Both the servers nodes selected, click adjacent.
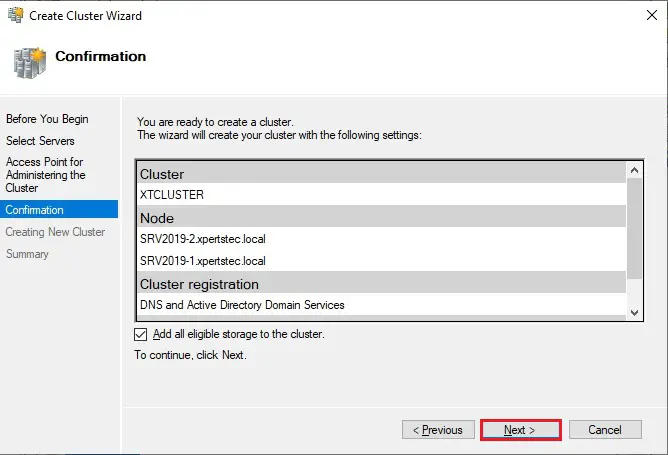
41- Blazon a Cluster name, select the IP accost and click next.

42- As a terminal step, confirm everything, click side by side and wait for the cluster to be created.
43- Cluster setup successfully completed and click Finish.
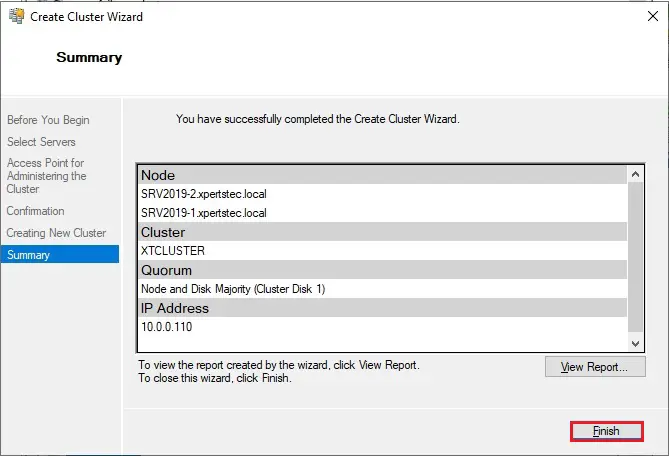
44- The wizard will add the shared disk automatically to the cluster per default. If y'all did not configure information technology nonetheless, then information technology is too possible afterwards. As a consequence, you can see a new Agile Directory reckoner object named XTCLUSTER.
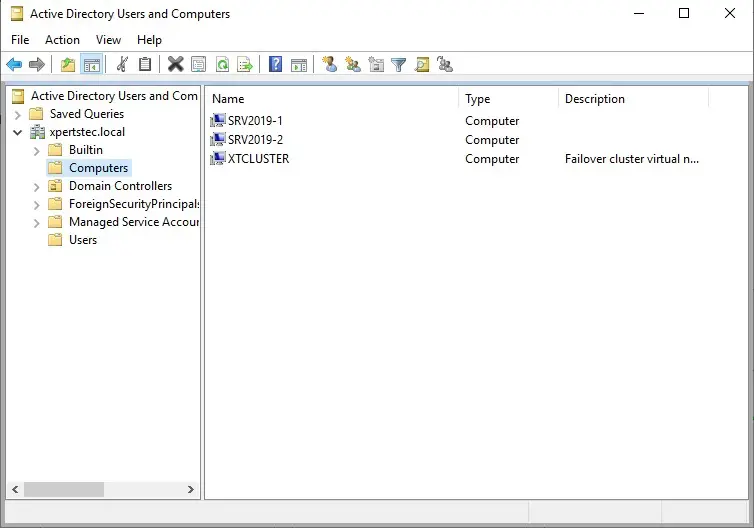
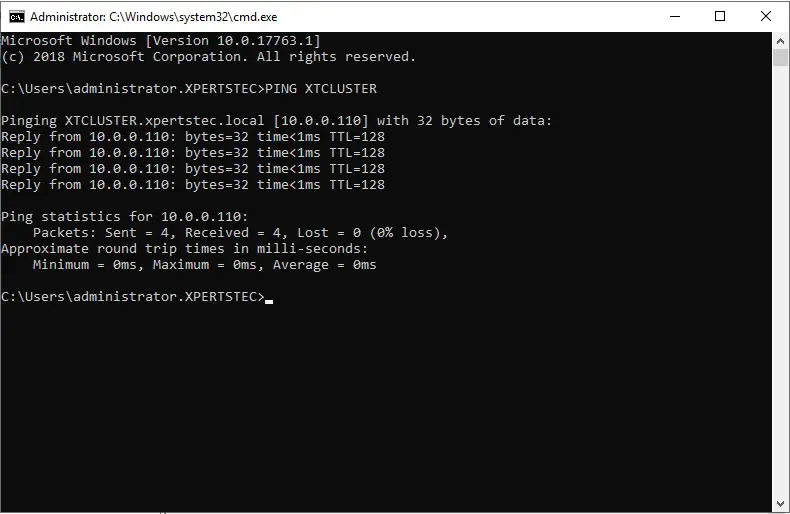
45- You can ping the new computer to check whether information technology is online (if y'all permit ping on the Windows firewall).
Every bit an alternative, you lot'll create the cluster also with PowerShell. the subsequent command also will add together all eligible storage automatically:
New-Cluster -Proper noun XTCLUSTER -Node SRV2019-1, SRV2019-2 -StaticAddress 10.0.0.110
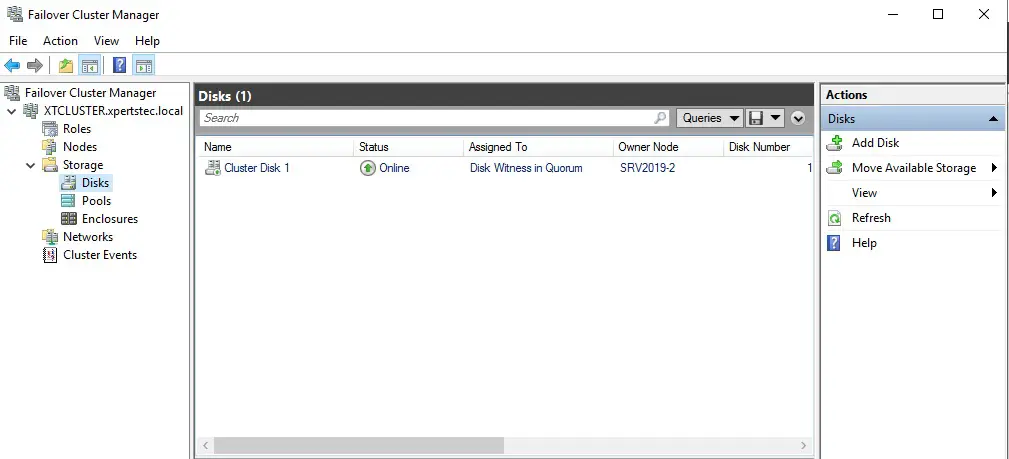
46- Both the Nodes are up now.
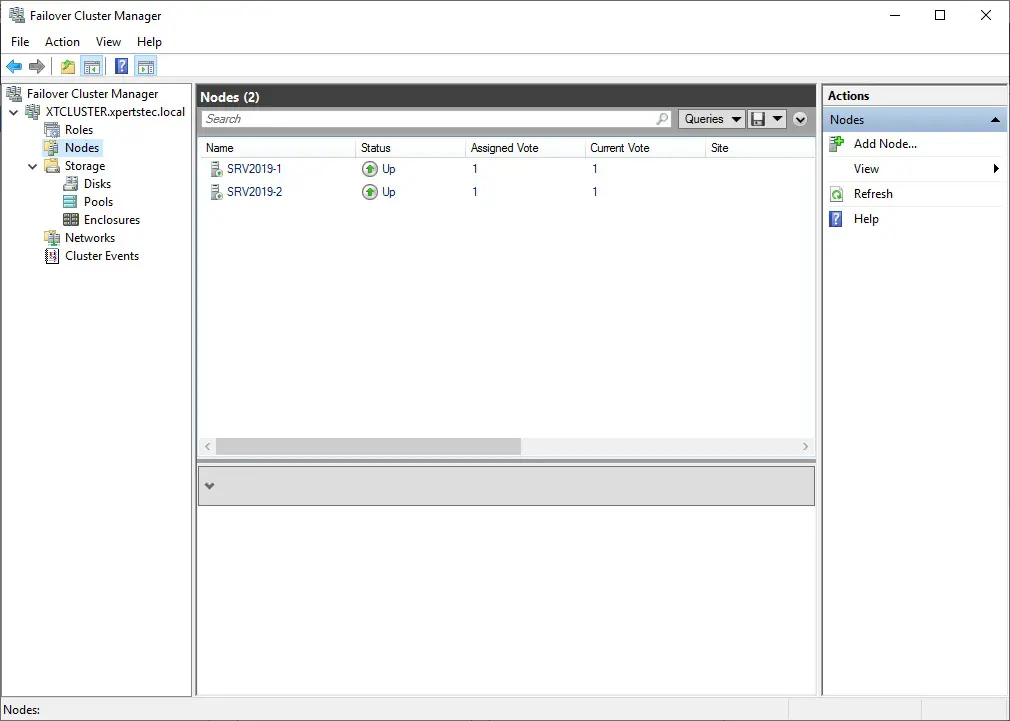
47- You lot can encounter the result in the Failover Cluster Manager in the Nodes and Storage under Disks sections.
For more information click here
How to Configure Network Load Balancing In Windows Server 2022.

Source: https://xpertstec.com/how-to-create-a-failover-cluster-in-windows-server-2019-step-by-step/
Posted by: trevinopopop1971.blogspot.com
0 Response to "How To Install Windows Server 2012 R2 Step By Step"
Post a Comment